Optimize the performance of your Android by learning how to update play store.
Frequently, your Android device ensures that your apps and operating system stay up-to-date effortlessly by executing regular automatic updates. This process ensures that your phone or tablet is equipped with the latest software, including bug fixes and essential security updates.
However, there might be instances when you prefer to initiate an immediate update before the automatic process takes place.
This scenario is particularly relevant for the Play Store, a crucial application responsible for managing and updating all other apps on your device.
Alternatively, you might find that the automatic updates setting has been deactivated, and you wish to re-enable it for seamless automatic updates. In such cases, the following steps outline what you should do.
Step-by-Step Guide How to Update Play Store for Android Devices
Ensuring that your Google Play Store is up-to-date is crucial for optimal performance and access to the latest features. Here’s a detailed guide on how to update Google Play Store app on your Android device.
Step 1: Launch the Google Play Store App
Open the Google Play Store app on your Android device.
Step 2: Access Your Account Settings
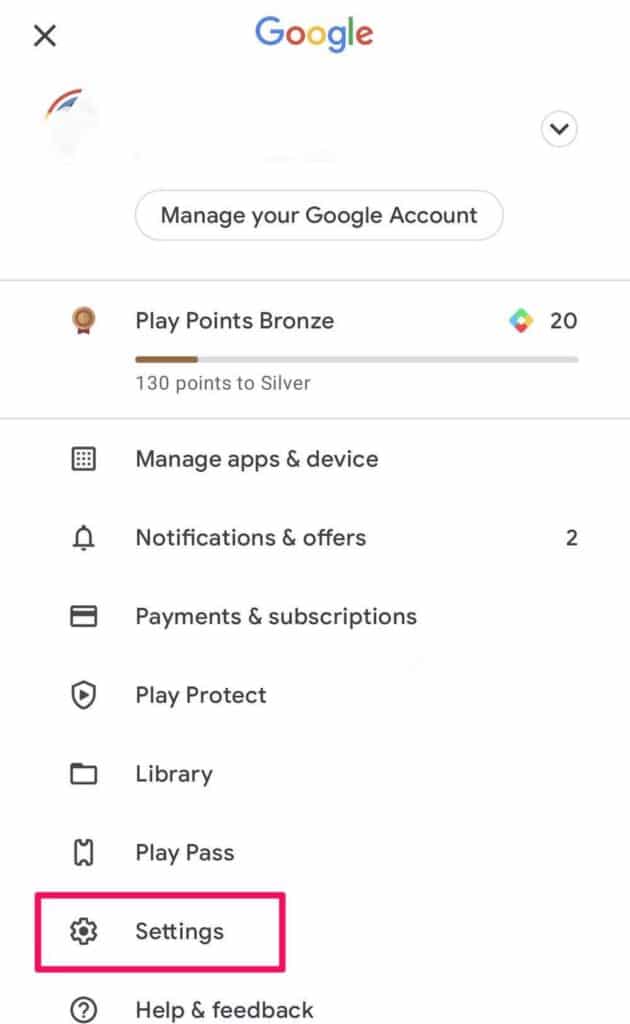
In the top right corner of the screen, locate and tap on your account icon. This icon is essential for accessing personalized settings.
Step 3: Navigate to Settings
From the menu that appears, select the “Settings” option. This will lead you to the configuration menu for the Google Play Store.

Step 4: Access the “About” Section
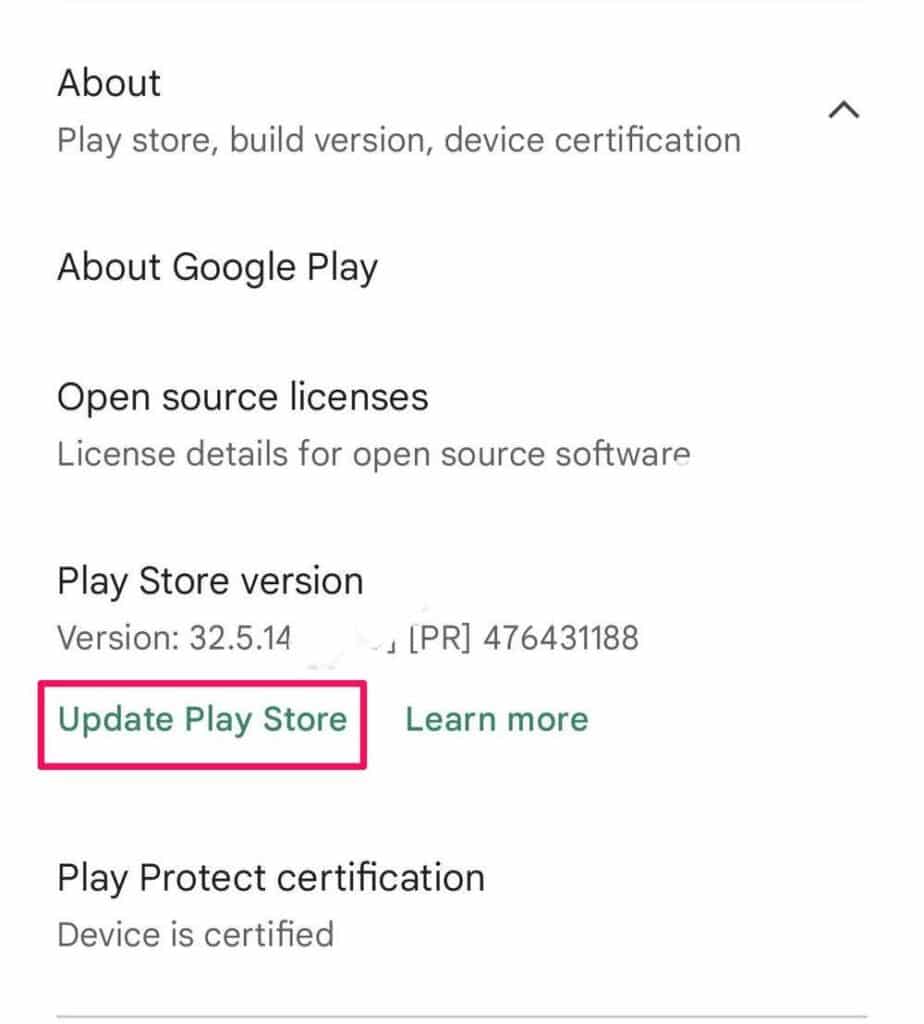
Within the Settings page, scroll down and find the “About” section. This is where you will find information about the current version of your Play Store app.
Step 5: Check for Updates
In the “About” section, locate the Play Store version information. If there is a newer version available, a prompt to update the Play Store will be visible. Simply tap on “Update Play Store” to initiate the update process.


