Nintendo Switch has undoubtedly captured the hearts of gamers with its unique blend of versatility and portability. While the handheld mode offers the convenience of on-the-go gaming, connecting your Nintendo Switch to the TV adds a new dimension to your gaming sessions, allowing you to enjoy your favorite titles on a larger and more immersive display.
In this guide, we will not only provide you with the necessary steps to connect Nintendo and also provide valuable insights into troubleshooting common issues, enhancing your gaming experience, and ensuring the safety and longevity of your gaming setup.
Rest assured, you are in capable hands as we guide you through this simplicity and professionalism process, making the transition from handheld to TV gaming a smooth and enjoyable.
Whether you’re a seasoned gamer looking to optimize your setup or a newcomer eager to explore the full potential of your Nintendo Switch, then this post should not exclude you. Stay tuned for an insightful and user-friendly guide
What is a Nintendo Switch
The Nintendo Switch is a popular gaming console developed by Nintendo, a renowned Japanese video game company. Launched in March 2017, the Switch stands out for its unique design that allows users to seamlessly switch between a home console and a portable handheld device.
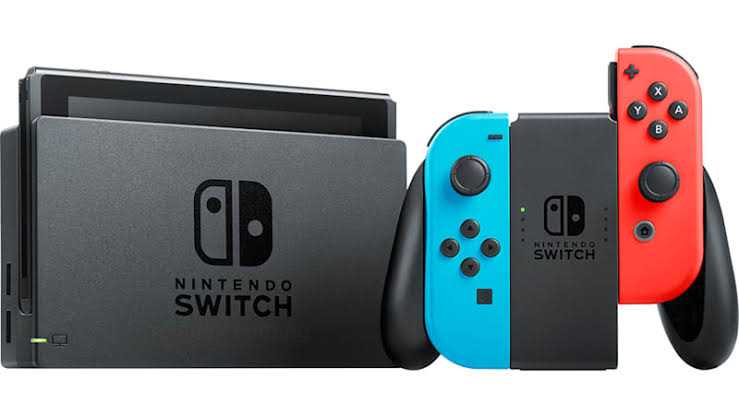
At its core, the Nintendo Switch comprises a tablet-like main unit with a 6.2-inch touchscreen display that can be docked to connect to a television. When docked, the Switch functions as a traditional home console, delivering high-quality gaming experiences on the big screen. On the other hand, users can undock the Switch and attach the Joy-Con controllers to the sides of the tablet, transforming it into a portable gaming device.
The Joy-Con controllers are versatile, offering multiple play styles. They can be used individually for solo gaming or attached to a grip for a more traditional controller feel. Additionally, the Joy-Cons support motion controls, adding an interactive element to certain games.
One of the Switch’s standout features is its library of games, including popular franchises like Super Mario, The Legend of Zelda, and Pokémon. The Nintendo eShop allows users to download games directly to their console, expanding the gaming library.
The success of the Nintendo Switch is attributed to its innovative design, diverse game library, and the flexibility it provides for gaming on the go or at home. It has garnered a wide fan base and continues to be a significant player in the gaming industry.
Necessary Equipment
To embark on this gaming adventure, you’ll need a few essential items. Below are the necessary things you need:
- A. HDMI cable
- B. Nintendo Switch Dock
- C. TV with available HDMI port
How to Connect Nintendo Switch to TV
Connecting your Nintendo Switch to your TV is a straightforward process that enhances your gaming experience on a larger screen. Follow these simple steps to seamlessly link your Nintendo Switch to your television:
Step 1: Gather Your Equipment
Ensure you have all the necessary components for the setup. You will need the Nintendo Switch Dock, HDMI cable, and a power adapter.
Step 2: Dock Your Switch
Place your Nintendo Switch into the Nintendo Switch Dock. The dock has a USB-C connector, and you should align the Switch’s USB-C port with it. Gently slide the Switch down until it is securely in place.
Step 3: Connect HDMI Cable
Take one end of the HDMI cable and insert it into the HDMI OUT port on the back of the Nintendo Switch Dock. The other end of the HDMI cable goes into an available HDMI port on your TV. Learn how to replace AirTag battery
Step 4: Power Up
Connect the power adapter to the Nintendo Switch Dock and plug it into a power outlet. Ensure that all the connections are secure.
Step 5: Select the Correct Input on Your TV
Using your TV remote, select the HDMI input to which you connected the Nintendo Switch. This information is often labeled on the TV remote or screen.
Step 6: Power On Your Switch
Press the power button on your Nintendo Switch to turn it on. You should see the Nintendo Switch logo on your TV screen, indicating a successful connection.
Step 7: Adjust Settings (If Needed)
In some cases, you may need to adjust the display settings on your Nintendo Switch. You can access these settings in the “System Settings” on the Switch’s home menu. Navigate to “TV Output” to configure display options if necessary.
How much is a Nintendo Switch
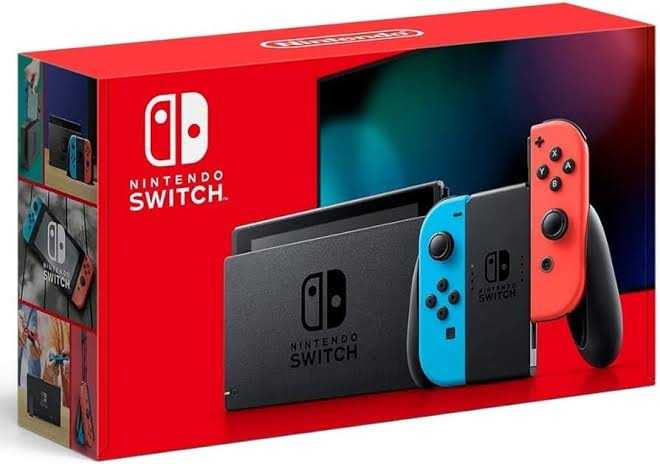
The standard Nintendo Switch model, including the main console unit, two detachable Joy-Con controllers, a docking station for TV connectivity, and necessary cables, generally falls within the price range of $299.99. This version provides users with the flexibility to seamlessly transition between a traditional home console setup and a portable handheld gaming experience.

Nintendo also offers the Nintendo Switch Lite, a more compact and dedicated handheld gaming device. Priced at around $199.99, the Switch Lite features an integrated design, meaning the controls are built into the device, making it exclusively suitable for handheld play. It does not support TV connectivity and lacks detachable Joy-Con controllers.
It’s worth noting that prices may vary based on factors such as geographical location, retailer promotions, or the inclusion of bundled games. Additionally, Nintendo occasionally releases special editions or bundles that may affect the overall cost.
For the most accurate and up-to-date pricing information, it is recommended to check with authorized Nintendo retailers or the official Nintendo website.
How to Reset Nintendo Switch
Resetting your Nintendo Switch can be useful in various situations, such as troubleshooting issues or preparing the console for a new user. Follow these simple steps to reset your Nintendo Switch:

Power Off the Console:
If it’s currently in sleep mode, hold down the power button on the top of the console until the Power Options menu appears. Select “Power Options” and then “Turn Off.“
Remove Joy-Con Controllers:
If you have Joy-Con controllers attached to the console, gently slide them off by pressing the small release button located on the back of each controller.
Access System Settings:
Turn on the Nintendo Switch by pressing the power button. Once the console is powered on, navigate to the home screen and locate the gear-shaped icon, representing “System Settings.” Select it to access the console settings.
Scroll to System:
Within the System Settings menu, scroll down on the left-hand side until you find the “System” option. Highlight and select it to reveal additional system-related settings.
Access Formatting Options:
Inside the System menu, you’ll find the “Formatting Options.” This is where you can initiate the process to reset your Nintendo Switch. Choose the option that allows you to initialize or format the console. Note that this action will remove all user data from the system memory.
Confirm the Reset:
Before the reset process begins, the system will prompt you with a confirmation message. Confirm that you want to proceed with the reset. Be aware that this action is irreversible and will delete all user data, returning the console to its factory settings.
Wait for the Reset:
Once confirmed, the Nintendo Switch will begin the reset process. Allow the console some time to complete the operation. It will restart, and you will be guided through the initial setup process, similar to when you first unboxed the system.
Complete the Initial Setup:
Follow the on-screen instructions to set up your Nintendo Switch anew. This includes selecting your language, connecting to a Wi-Fi network, and configuring your user account.


