As time goes on, you might find that your collection of photos, videos, documents, and games starts to occupy a large amount of space on your device. However, there’s a solution to this problem that doesn’t involve deleting anything.
You can compress several files into a ZIP file, which reduces their size without removing any content. This process, known as zipping files, is a handy way to free up storage space on your device. It’s also useful for sharing files with others or storing files that you don’t need to access frequently.
Understanding Zip Files: A Simplified Explanation
A zip file is like a magic box that helps you store lots of stuff in a smaller space. It’s an archive file format that uses a special technique called “lossless data compression.” This means that when you put your files into a zip folder, none of your precious data gets lost in the process.
When you see a zip file on your computer, it looks like a regular folder, but it’s actually much smarter. It compresses the files inside it, so they take up less storage space on your computer. This is super handy, especially when you’re downloading software. Instead of waiting for hours, zip files can transfer program files in just a few minutes!
The three major operating systems your computer might use: Windows, Linux, and macOS.
Depending on which system you’re using, the steps to convert a file or folder into a zip file can be a bit different. But don’t worry, it’s not too complicated once you know what to do.
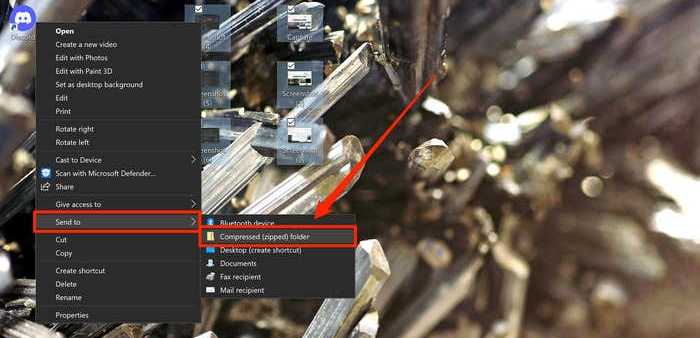
On Windows computers, you can easily create a zip file by right-clicking on the file or folder you want to compress. Then, choose “Send to” and select “Compressed (zipped) folder.” It’s as simple as that!
For Linux users, you can use commands like “zip” or “tar” in the terminal to create a zip file. Just type in the right command followed by the name of the file or folder you want to compress.
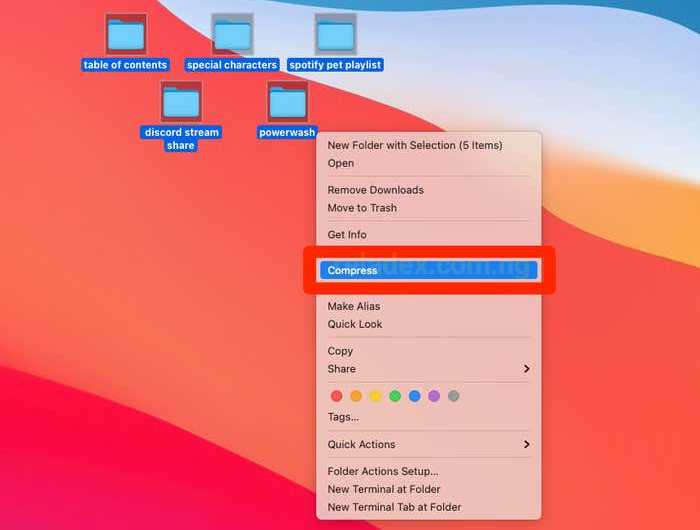
If you’re using a macOS computer, creating a zip file is also straightforward. Just right-click on the file or folder, then select “Compress [file/folder name].” Easy peasy!
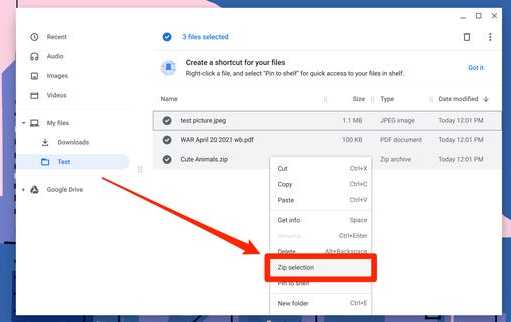
How to Create a Zip File on Windows
Creating a zip file on a PC is easy. Just follow these steps:
- Select the file, files, or folder you want to zip. You can put your files into a folder beforehand or select them using the Ctrl key. Hold down the Ctrl key and click on each file you want to include.
- Right-click the selected file(s) or folder. Once you’ve chosen the files, right-click on any one of them.
- Choose “Send to.” A menu will appear with various options. Select “Compressed (zipped) folder” from the list. This will create a new zipped folder containing your files. If you want to rename the folder, right-click on it and select “Properties.”
How to Create a Zip File on Linux
Linux users can also create zip files using command prompts. Here’s how:
- Open the terminal. You can do this by clicking on the terminal icon or by using the Ctrl + Alt + T key combination. On a Mac, you can find the terminal using the Launchpad and typing “Terminal.”
- Install zip support if needed. Some Linux distributions come with zip pre-installed, but if not, you can easily add it. For Ubuntu and Debian, type “sudo apt install zip” and for CentOS, type “sudo yum install zip.”
- Navigate to the folder/directory with the files you want to zip using the “cd” command. For example, type “cd Pictures” to go to the Pictures folder.
- Use the zip command to create the zip file. Type either “zip -r [zip folder name].zip” for a folder or directory, or “zip -r [zip file name].zip file-folder1 file-folder2” for specific files or folders.
- Verify that the zip file was created successfully. You should see the files being added to the newly created zipped folder.


![How to Format a Laptop: [ Step-by-Step]](https://reladex.com.ng/wp-content/uploads/2024/09/iMarkup_20240901_002324.jpg)
