Apps can take up a significant amount of space on your computer, impacting its performance. It’s crucial to know how to remove them to ensure your system runs smoothly.
If you’ve been experiencing issues like slowness, freezing, or annoying pop-ups, deleting malicious programs and unnecessary apps can potentially resolve these problems.
Here’s a comprehensive guide on how to uninstall apps on Windows 11 PC using various methods.
If your computer has been acting up—being slow, freezing, or bombarded with pop-ups—consider reaching out to reladex. Our skilled technicians can promptly provide solutions to identify issues, eliminate viruses, and even install antivirus software to enhance your computer’s security.
For a quick solution to your computer troubles, this article is right there for you.
How To Uninstall Apps on Window 11 (Using Windows Logo)
If you’re looking for a swift way to remove apps from your Windows 11 PC, follow these easy steps. Begin by left-clicking on the Windows logo located at the bottom of your screen. Next, select “All apps” and scroll down to locate the app you wish to uninstall. Once you find it, right-click on the app and choose “Uninstall.” Confirm your choice by clicking “Uninstall” again, and voila, you’ve successfully removed the app from your PC. It’s as simple as that!
Step-by-Step Guide: Uninstalling Apps on Windows 11
1. Start by left-clicking on the Windows logo located at the bottom of your screen. This logo consists of four squares and is usually centered in your Taskbar. It serves as the gateway to your system’s Start Menu.
2. Once the Start Menu is open, navigate to the top-right corner and click on “All apps.” This button holds the key to accessing a comprehensive list of your installed applications.
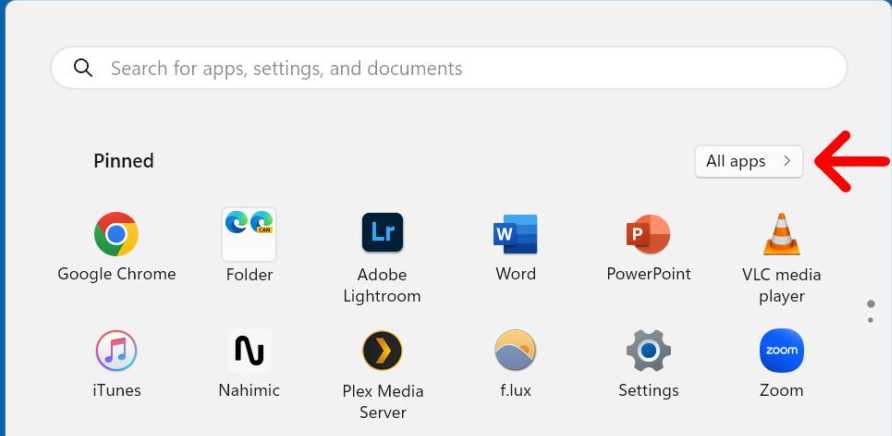
3. Find the specific app you want to uninstall by scrolling down the list. If you can’t spot it immediately, try exploring within app folders. For instance, your downloaded games might be tucked away in the “Steam” folder.
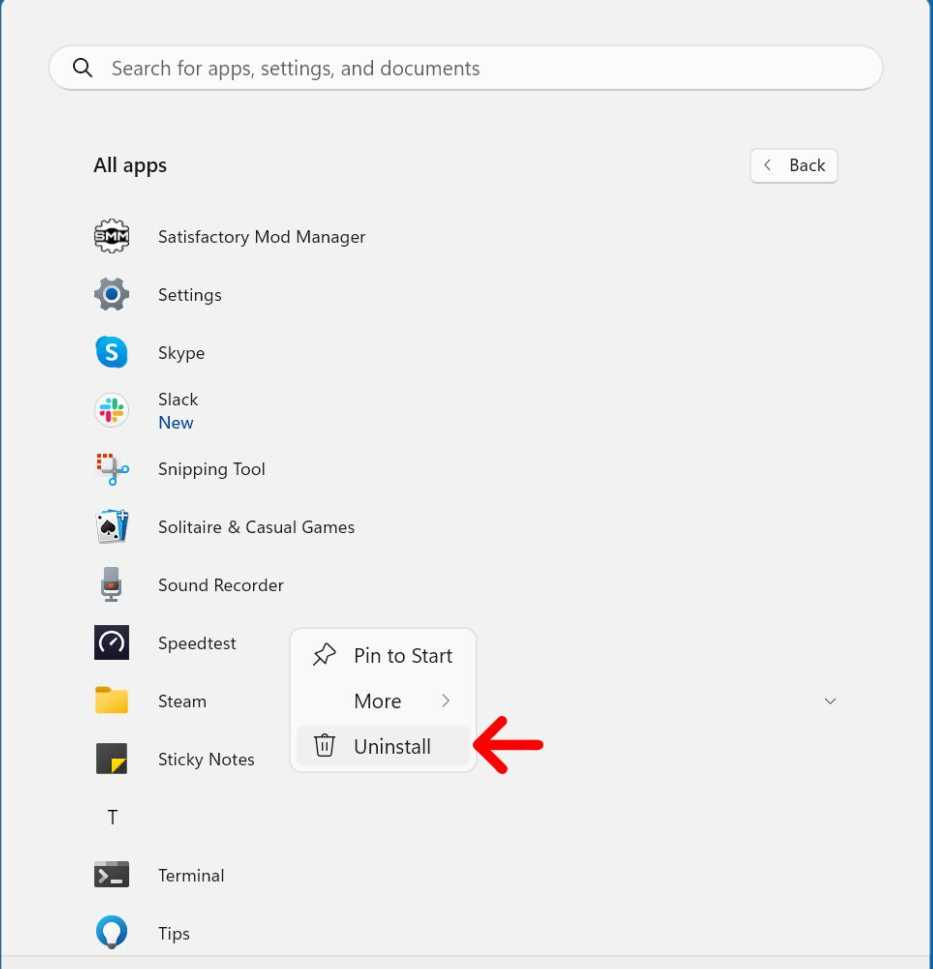
4. Right-click on the app you wish to remove. This action will prompt a menu with various options.
5. Within this menu, click on “Uninstall.” Confirm your decision to uninstall the app.
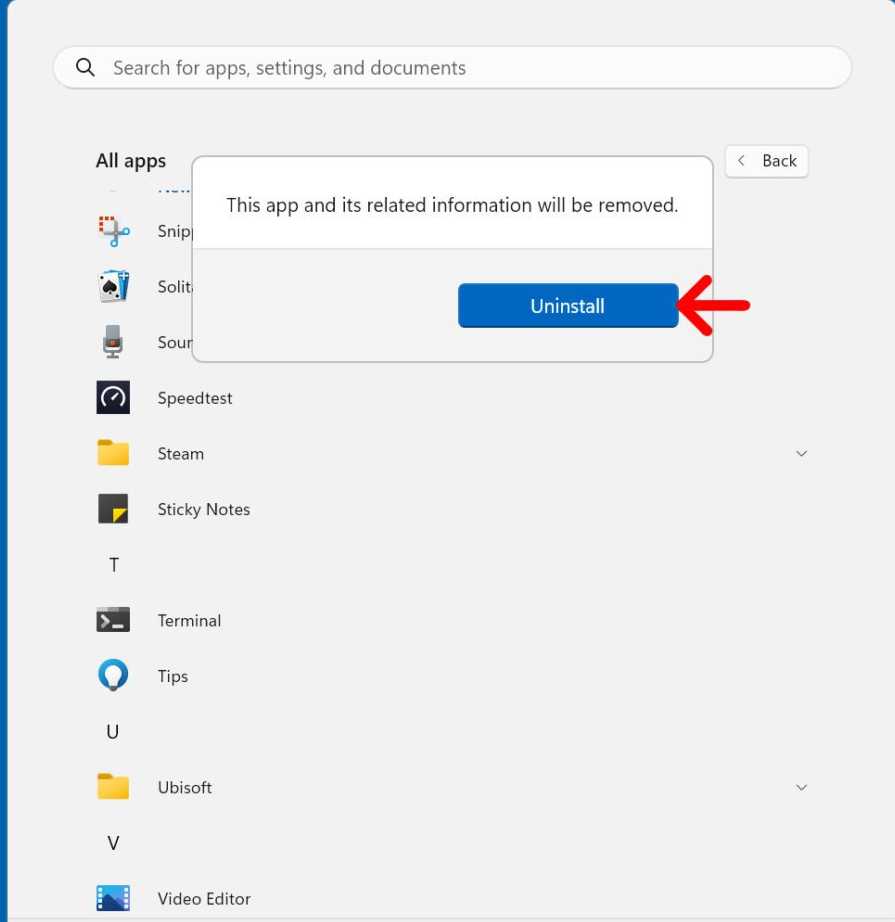
6. As a final step, click “Uninstall” once again. This ensures that the uninstallation process is initiated.
Note: By following these straightforward steps, you can uninstall apps from your Windows 11 PC, making the process hassle-free. But some applications might demand you to go through settings before you can uninstall them. More also, using this method you may not be able to see much information about the applications taking up space on your computer system. Learn how to change country on Google play store.
How to uninstall Apps on Window 11 PC (using settings option)
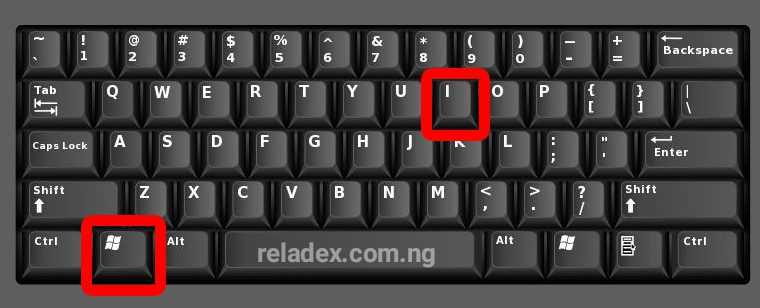
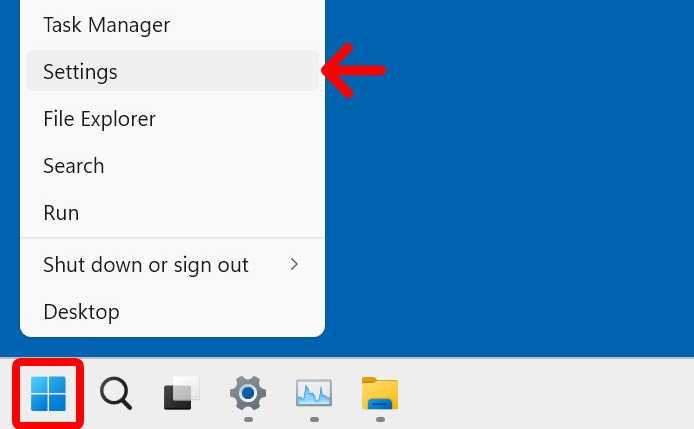
1. Begin by pressing the Windows key and the letter ‘i’ on your keyboard simultaneously (window + i). This action will open the Settings window, where you can manage various aspects of your computer.
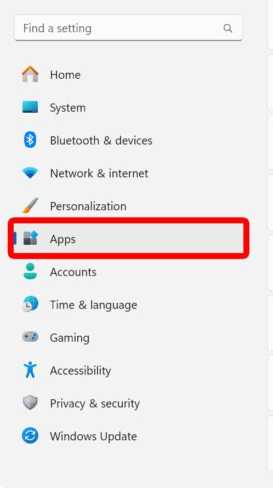
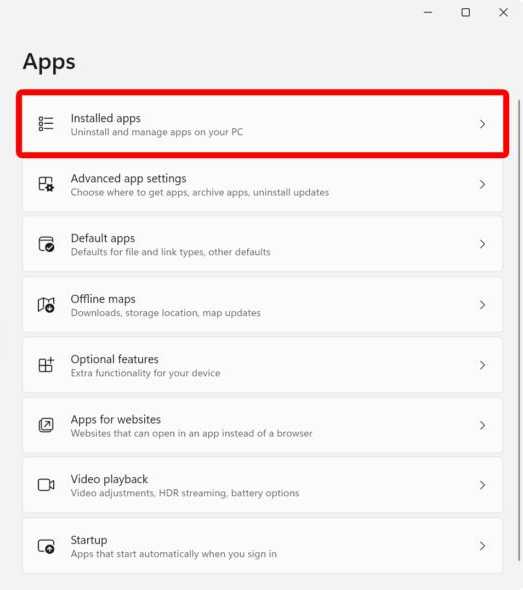
2. Inside the Settings window, look to the left sidebar and click on “Apps.” This section is your go-to for handling applications on your PC. On the right side of the window, you’ll see an option labeled “Installed Apps.” Select this option to view a list of all the apps currently on your computer.
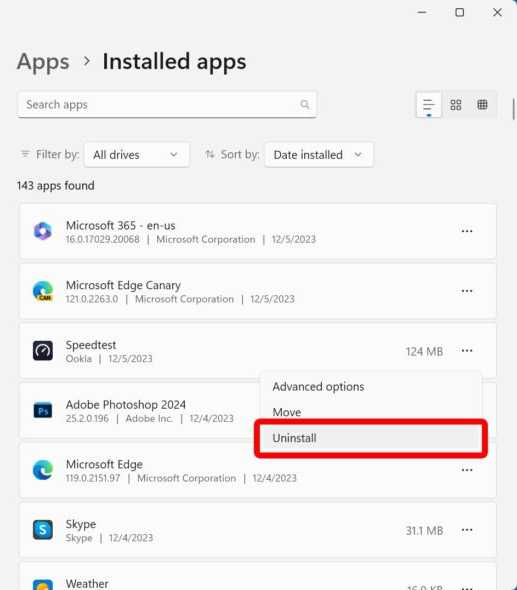
3. Scan through the list and find the app you wish to uninstall. From this option, you can easily determine which apps take up space most. Once you’ve located it, click on the three-dot icon positioned next to the app’s name. This will open a menu with additional options.
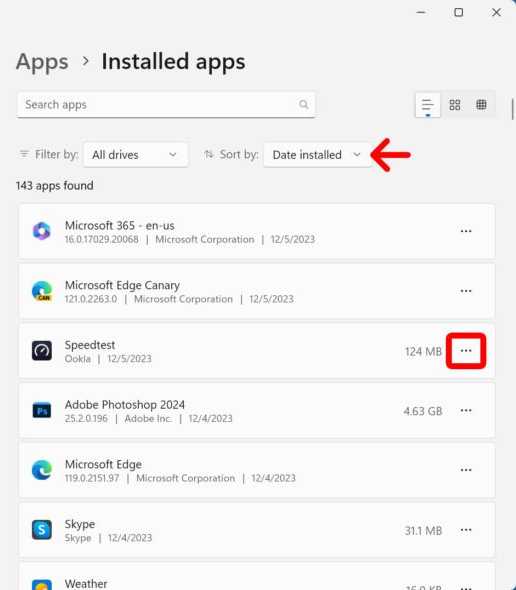
4. Within this menu, choose “Uninstall,” and then confirm your decision by selecting “Uninstall” again. This will initiate the removal process for the selected app.
How to remove Apps on Window 11 PC via Control Panel
If you wish to uninstall apps from your Windows 11 PC using the Control Panel, follow these uncomplicated steps to ensure a smooth process and optimized your laptop for performance.
1. Begin by clicking on the Windows logo at the bottom of your screen. Once clicked, type “Control Panel” into the search bar that appears.
2. Open the Control Panel from the search results. Inside the Control Panel, locate and click on “Programs and Features.” This section is where you’ll manage the applications installed on your PC.
3. Scroll through the list to find the specific app you want to remove. Once you’ve identified it, right-click on the app and select “Uninstall.”
Important Tips: Exercise caution when uninstalling apps from the Control Panel, as some are essential for your system’s proper functioning. Removing certain apps can lead to system instability or breakdown.
